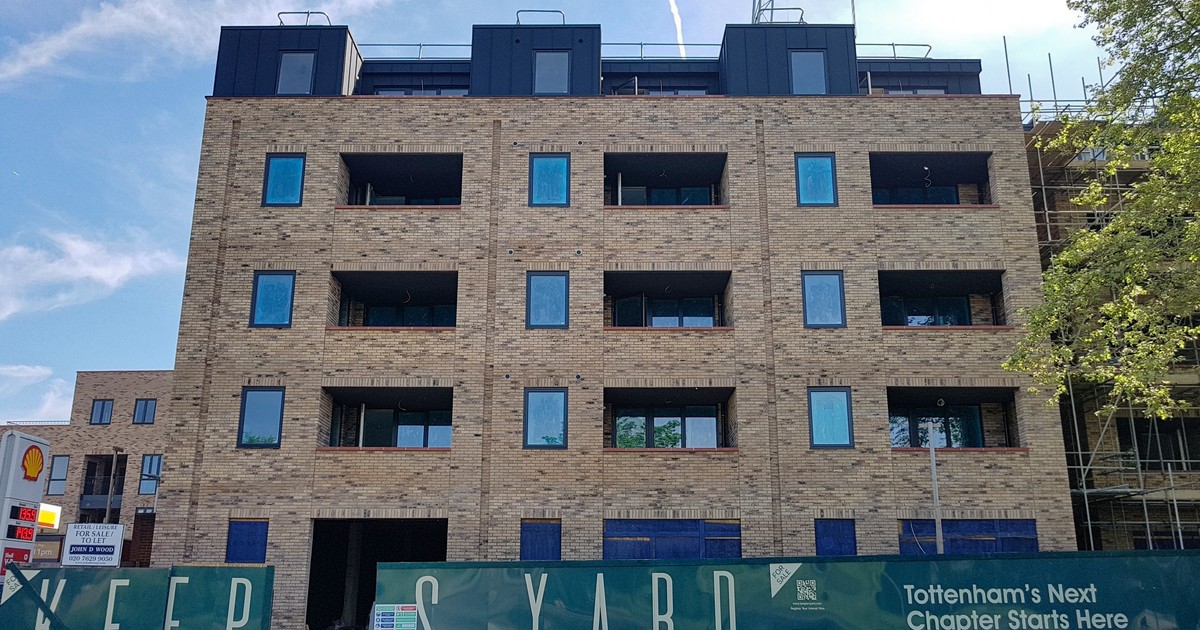
Author: Mark Dupuis

  • Victoria, BC Building Permit Guide: What You Need to Know Before You Apply

    Victoria, BC Building Permit Guide: What You Need to Know Before You Apply

    At a glance

    • City of Victoria building permits are handled at City Hall, 1 Centennial Square. The number to call is 250-361-0344. The email is permits@victoria.ca.
    • Application fee is $100, due when you apply. Building permit fee is 1.4% of construction value, due when the permit is issued.
    • If you build without a permit and get caught, the fee is 2.8% on the first $20,000 of value — basically double.
    • Big jobs can take up to six months to process. Most residential renos sit in the 4–12 week range once your application is complete.
    • Development Cost Charges (DCCs) and Amenity Cost Charges (ACCs) can stack on top of permit fees for new construction.

    Estimated read time: 7 minutes


    Why I wrote this

    I live in Duncan but I sold cars across Vancouver Island for 20 years and I’ve had hundreds of customers who lived, worked, and renovated in Victoria. Same theme every time: “Mark, I had no idea how the permit thing worked until I was three weeks in.”

    Victoria’s permit office is bigger than Duncan’s. The process is more formal. The fees are actually published — which is a refreshing change from most BC municipalities. But “more information available” doesn’t mean “easier to navigate.” This is the homeowner’s quick guide before you start clicking around the city website at 10 PM trying to figure out where to begin.


    First — confirm you’re actually in the City of Victoria

    This sounds dumb but it trips people up. The Capital Regional District is a patchwork. “Victoria” in casual conversation usually means Greater Victoria. But the City of Victoria itself is a small footprint — basically downtown, James Bay, Fairfield, Fernwood, Oaklands, Vic West, Burnside-Gorge, and Rockland-Jubilee.

    If your address is in:

    If you’re not sure, call 250-361-0344 and ask. They’ll tell you in under a minute.


    When you need a building permit in Victoria

    The City of Victoria follows the BC Building Code, like every BC municipality. A permit is required when you’re:

    • Building a new house, addition, or accessory building
    • Adding or modifying a secondary suite or garden suite
    • Making structural changes to an existing building
    • Doing interior alterations that affect plumbing, framing, or change of use
    • Changing the exterior of a building
    • Demolishing a building or part of one
    • Putting in a solid fuel appliance (wood stove, pellet stove)

    You don’t typically need a building permit for:

    • Painting, flooring, swapping cabinets where nothing structural or plumbing-related changes
    • Replacing windows like-for-like in the same opening size
    • Repairing roofing with the same material
    • Fences (still subject to bylaws)
    • Low decks under 600 mm above grade

    Electrical and gas work are separate and go through Technical Safety BC, not City Hall. If a licensed tradesperson is doing the work, they pull those permits. If you’re doing it yourself, you do.


    The development permit catch — this is the big one in Victoria

    Here’s where Victoria is different from Duncan or the CVRD. For many properties, you need a Development Permit BEFORE you can apply for a Building Permit. Development Permits regulate how a building looks and fits into its neighbourhood, especially in:

    • Heritage areas
    • Designated Development Permit Areas (DPAs) — there are 16 of them across the city
    • Areas with form-and-character guidelines

    If your property falls inside a DPA, you’ll need the Development Permit approved first. That alone can take weeks or months depending on whether your application needs to go to a panel or to Council.

    How to check if you’re in a DPA: Call the city, or use VicMap which is their online property tool.


    What it actually costs (the published numbers)

    Victoria publishes its fees — credit to them. From the City’s Guide to Building Permit Fees and Deposits:

    Fee Amount
    Application fee (due at time of application) $100
    Building permit fee 1.4% of cost of construction (excluding plumbing and electrical)
    Building permit fee if work was done WITHOUT a permit 2.8% on first $20,000 of value, 1.4% on remainder
    Permit extension or reactivation $100
    Permit revisions after issuance $100 OR 10% of original permit fee OR $125 per hour of staff time, whichever is greater
    Re-inspection (when more than 2 inspections required due to non-compliance) Variable

    Real-world math:

    • $50,000 reno: $100 application + $700 permit fee = roughly $800 total
    • $200,000 addition: $100 + $2,800 = $2,900
    • $500,000 new build: $100 + $7,000 = $7,100, plus DCC and ACC charges on top

    DCC (Development Cost Charges) and ACC (Amenity Cost Charges) are separate and apply mostly to new construction. ACC charges came into effect October 2, 2025 — they’re newer. The city allows DCC and ACC to be paid in installments for some applications but a minimum 25% is due at permit issuance.


    How long does it take?

    The City of Victoria’s own guidance flat-out says: “If you plan extensive changes, the permit process could take up to six months.”

    From what I’ve heard from former customers who built in Victoria:

    • Simple residential reno (no DPA): 4–8 weeks once complete application is submitted
    • Larger reno or suite addition (no DPA): 8–16 weeks
    • New build or major addition with Development Permit: 4–9 months total (Development Permit + Building Permit stacked)
    • Anything requiring rezoning or a Public Hearing: plan on 9–18 months

    The clock starts the day your application is complete — meaning all checklists, drawings, fees, and supporting documents are in. If something’s missing, the clock doesn’t tick.


    What you submit with the application

    From the City’s Single Family Dwelling Checklist:

    • Completed building permit application
    • $100 application fee
    • Site plan with property dimensions, north arrow, street names, building location, parking, access points, setbacks, easements
    • Floor plans drawn to scale (¼” = 1′ or 1:50) showing all rooms with dimensions and use
    • All elevations (exterior views) showing finished grade, materials, roof slope
    • Cross-section drawings showing structural details
    • Foundation plan
    • All plumbing fixture locations
    • Wall structure details and any fire separations
    • For larger projects: engineer-stamped structural drawings and Schedule B Letter of Assurance
    • Energy efficiency / Step Code compliance documentation (BC Energy Step Code applies)

    Incomplete applications get sent back. Don’t submit a partial.


    The Development Permit fees (separate from Building Permit)

    If you’re in a Development Permit Area, you’ll see fees like:

    • Development Permit base fee: $3,000 — $7,500 depending on the type
    • Development Permit with variance: $750 (includes one variance, $250 per additional variance)
    • Rezoning: $2,000 per dwelling unit (multi-family) or $3,000+ base fees
    • Resubmission fee (if your application doesn’t address city requirements): $500
    • Community Meeting Fee (rezoning): $800–$2,400

    If your project is 100% affordable housing, the base fees may be waived under Victoria’s Affordable Housing policy.


    The “build without permit” penalty

    Cities don’t love getting fooled. Victoria’s stated penalty for unpermitted work is straightforward: the permit fee doubles to 2.8% on the first $20,000 of construction value, then drops back to 1.4% for the remainder. Plus you might face a Stop Work Order, plus you have to redo or expose work that was already covered.

    On a $30,000 unpermitted basement reno, that’s:

    • Normal permit fee: $30,000 × 1.4% = $420
    • Penalty permit fee: ($20,000 × 2.8%) + ($10,000 × 1.4%) = $560 + $140 = $700
    • Difference: $280 — plus all the headache of the city demanding inspection access

    It’s not a fortune. But the headache, the stop-work disruption, and the resale problem (every BC home sale form asks if there’s unpermitted work) make this a bad financial bet.


    Who you actually call in Victoria

    What you need Who handles it
    Building permits in City of Victoria Permit Services, 250-361-0344, permits@victoria.ca
    Development permits Same office
    Zoning questions zoning@victoria.ca
    Business licence businesslicence@victoria.ca
    Sign permits permits@victoria.ca
    Electrical & gas permits Technical Safety BC
    Health approvals (septic in unincorporated areas, food service, pools) Island Health
    Saanich, Oak Bay, Esquimalt, etc. Each municipality’s own building department
    Unincorporated CRD areas CRD Building Inspection

    City Hall: 1 Centennial Square, Victoria, BC V8W 1P6


    FAQ

    Do I need a permit for a deck in Victoria?
    If the deck surface is more than 600 mm above grade, yes. Anything attached to the house generally needs review even at lower heights. Check with the city.

    Can I apply for a permit myself as the owner?
    Yes. Owners can apply for permits on their own properties. If a designer, contractor, or anyone else is applying on your behalf, you’ll need to sign an Appointment of Agent form.

    Can I submit my application by email?
    Yes. Victoria accepts applications via email at permits@victoria.ca. Bigger applications may need to be submitted through their permit portal or in person depending on size.

    How long is a Victoria building permit valid?
    Standard BC: typically you have one year to start work, and the permit must be kept active through construction. If it expires, the $100 reactivation fee applies.

    What’s a “partial permit” and should I ask for one?
    You can request a partial permit at no extra cost when you submit your application. This lets you start foundation or other early work while the rest of the permit is still being reviewed. Box gets checked on the application form.

    Are there fee holidays I should know about?
    As of writing this, Victoria has implemented a fee holiday for some municipal permits to encourage housing development. Check the current fee summary before assuming you’ll pay full fees.

    Do I need a Development Permit AND a Building Permit?
    Often yes, especially in heritage areas, Development Permit Areas, or for new builds. The Development Permit must be issued before the Building Permit. Plan for both timelines.


    Bottom line

    Victoria is more formal and more expensive than Duncan or the Cowichan Valley, but the city actually publishes its fees and procedures — which is more than I can say for most BC municipalities. The $100 application fee gets you in the door. The 1.4% permit fee is what most jobs run into. The Development Permit Area thing is the curveball most homeowners don’t see coming, so check that first.

    If you’re starting a project in Victoria, do three things before anything else:

    1. Email permits@victoria.ca with your property address and a short description of your project. Ask if you’re in a DPA.
    2. Check VicMap to confirm zoning.
    3. Book a pre-application meeting if your project is more than a simple reno. It’s free and it’ll save you weeks.

    Call 250-361-0344 and get a real human on the line. They’ve heard your question before.


    Related guides from Homer Shack Hub:


    Brew approves the messages. — Mark Dupuis, Duncan, BC
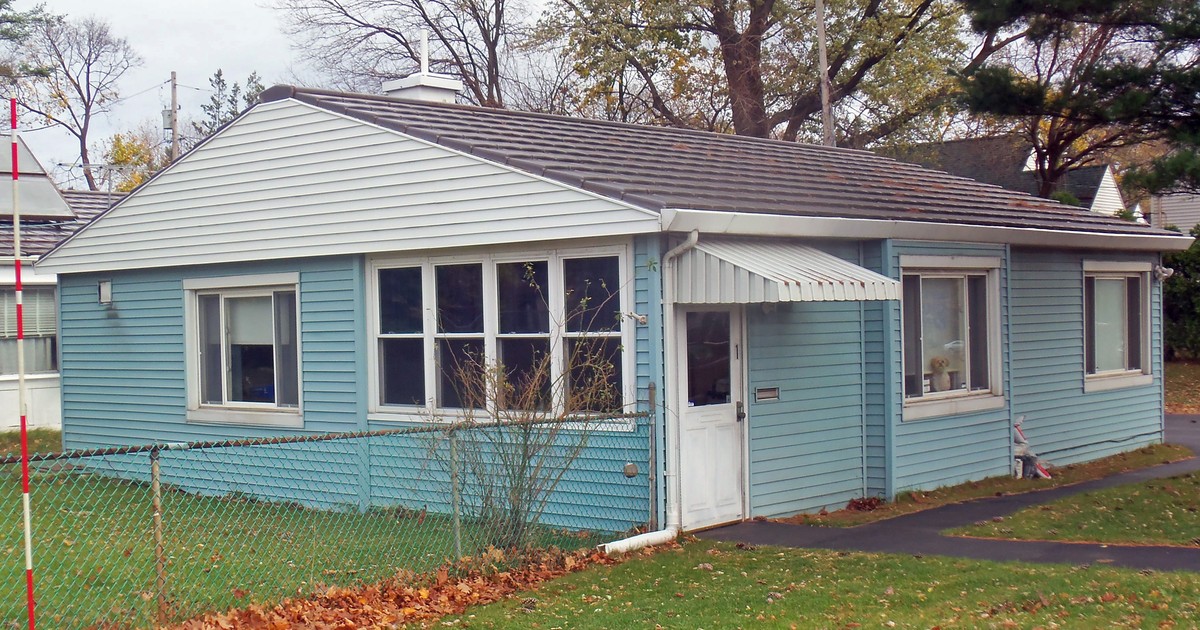
  • Duncan, BC Building Permit Guide: What You Actually Need to Know

    Duncan, BC Building Permit Guide: What You Actually Need to Know

    At a glance

    • Building permits in the City of Duncan are handled by the Building Department at City Hall, 200 Craig Street.
    • Anything structural, plumbing, or electrical inside city limits goes through the city. If you’re outside city limits, you’re in the CVRD and that’s a different office.
    • Fees aren’t posted online — you find out after staff review your application.
    • The phone number you actually need is 250-746-6126. The email is developmentservices@duncan.ca.
    • Plan on at least one meeting with the Building Inspector before anything gets approved.

    Estimated read time: 6 minutes


    Why I wrote this

    I live in Duncan. I’ve lived in this valley most of my adult life, sold cars 15 minutes from here at Duncan Honda for fifteen years, and watched plenty of neighbours get tangled up trying to figure out whether they need a permit for a deck, a shed, a new bathroom, or a granny suite. The answer is almost always “yes, and here’s the part nobody tells you” — so this is the part nobody tells you.

    This is the homeowner’s version. Not the contractor’s version, not the architect’s version. Just what you need before you pick up the phone.


    First question: are you actually in the City of Duncan?

    This trips people up more than anything else. The City of Duncan is small — under two square kilometres. If your address says Duncan but your property is technically in North Cowichan, the CVRD, or one of the surrounding electoral areas, you do not deal with the City of Duncan for permits. You deal with the Cowichan Valley Regional District or with North Cowichan.

    Quick check:

    • City of Duncan handles permits only within actual city limits (the few blocks around downtown).
    • North Cowichan handles most of the surrounding area — Maple Bay, Crofton, Chemainus, most of the rural stretches.
    • The CVRD handles the unincorporated areas farther out.

    If you’re not sure, call 250-746-6126 and ask. They’ll tell you who actually owns your file in about ten seconds.


    When you need a permit in Duncan

    The City of Duncan follows the 2024 BC Building Code, same as everywhere else in the province. The general rule is: if you’re changing the structure, the layout, or any regulated system (plumbing, electrical, gas), you need a permit.

    That includes:

    • Building a new house, addition, or accessory building over a certain size
    • Adding or modifying a secondary suite (granny suite, basement suite)
    • Moving interior walls or changing structural elements
    • Installing or moving plumbing fixtures
    • Putting in a deck above a certain height above grade
    • Demolishing a building or part of one
    • Changing the occupancy of a building (turning a garage into a living space)
    • Putting in a wood stove or solid fuel appliance

    What usually doesn’t need a building permit:

    • Painting, flooring, cabinet swaps where you’re not moving plumbing
    • Repairing or replacing a faucet, fixture, or hot water tank without changing the piping layout
    • Small accessory buildings under the threshold
    • Fences (though there are bylaw rules)
    • Low decks below 600 mm above grade

    But here’s the part I keep telling my neighbours: electrical work is its own permit, separate from the building permit, and it goes through Technical Safety BC — not the City of Duncan. Same with gas. If you’re hiring a tradesperson, the licensed one pulls their own permit. If you’re doing it yourself, you pull it yourself, and you’d better know what you’re doing.


    The application process — step by step

    Here’s how it actually works in Duncan, based on the city’s own application checklist:

    Step 1: Talk to staff first. Before you submit anything, you meet with the Building Department to confirm your use is permitted under the City of Duncan Zoning Bylaw, check parking requirements if applicable, and find out what other regulations apply to your specific property. This step is free. Skip it and you’ll waste weeks.

    Step 2: Meeting with the Building Inspector. Before the full review, the applicant and Building Inspector go through the application together. This is your chance to catch problems before they cost you money.

    Step 3: Site review. The Building Inspector reviews the actual site — not just your paperwork. They want to see the property.

    Step 4: Plan review against the BC Building Code. The Inspector checks your drawings against local bylaws and the BC Building Code. If there are problems (and there usually are), you’ll get a list of required changes. Revising drawings is on you — get your designer or contractor lined up before you start, because rev rounds eat time.

    Step 5: Permit issued. Once your drawings clear, the permit gets issued with a condition: construction must match the approved drawings. Period. You change something mid-build, you come back to the office.

    Step 6: Inspections. The permit comes with an inspection card listing the inspections you need to schedule — framing, plumbing, insulation, final, and so on depending on the scope. The approved drawings must be on site for every inspection. Miss one or close walls before they’re checked and you’re tearing it back open.


    What you submit with the application

    This list is straight from the city’s tenant improvement / building permit checklist. Even for a residential job, expect most of these:

    • Completed building permit application
    • Application fee (amount confirmed after staff review the scope)
    • Appointment of Agent form if someone other than the owner is applying
    • Site plan with property dimensions, north arrow, street names, building location, parking, access
    • Floor plans to scale (¼” = 1′ or 1:50) showing existing and proposed construction
    • All outside dimensions and total square footage
    • Room dimensions and use
    • Interior partitions including partition height
    • Door sizes and swing direction
    • All plumbing fixtures (new and existing identified)
    • Construction details: wall structure, fire ratings if applicable, fire stopping for service penetrations, structural changes

    For Part 3 buildings (apartments, commercial) you need engineer-stamped structural drawings and a Schedule B Letter of Assurance. For most residential jobs you don’t — but if you’re touching the structure, an engineer is going to be involved one way or another.

    The big one most people forget: incomplete applications are not accepted. They get sent back. You don’t lose your spot in line because you never got into the line.


    How long does it take?

    The City of Duncan doesn’t publish a public timeline the way Vancouver does. From people I’ve talked to and from what the CVRD lists as their target for their own area (4 weeks for a complete application), here’s the rough shape:

    • Simple residential reno: 3 to 6 weeks once your application is complete
    • Suite addition or larger reno: 6 to 12 weeks
    • New build, addition, or laneway-type project: 10 to 18 weeks

    These are estimates. Add time for every revision round. Add time if your file gets bounced to other agencies (Vancouver Island Health for septic, Ministry of Transportation for highway access, etc.).

    One thing I keep hearing from my old Honda customers turned homeowners: the timeline starts the day your application is complete, not the day you walk in the door. If staff need three things from you, the clock isn’t ticking until you’ve handed all three over.


    What it costs

    City of Duncan doesn’t publish a fee schedule on their public website. The application fee is set after staff review your scope. The actual permit fee in BC is almost always a percentage of construction value — at the CVRD it’s 1.4% under their building bylaw, and Duncan is in the same ballpark.

    Rough math for a $50,000 reno: figure $700 to $900 in permit fees, plus an application fee of a couple hundred. For a $300,000 addition: figure $4,000 to $5,000 in permit fees alone. You’ll also potentially owe Development Cost Charges (DCCs), trade permits for plumbing and gas, and inspection fees.

    Call the city and ask. They’ll tell you on the phone. 250-746-6126.


    What happens if you build without a permit

    I’m going to be straight with you: people do it. Some get away with it. Many don’t.

    What goes wrong:

    • The city finds out (neighbour complaint, sale of the property, insurance claim)
    • You face a stop-work order and have to apply retroactively, often with double fees
    • You can’t sell the property without disclosing it, and the buyer’s lawyer or home inspector finds it
    • Your home insurance won’t cover damage tied to unpermitted work
    • Your mortgage lender can refuse to refinance

    I sold cars for twenty years. I know the temptation to skip a step to save a buck. Permits are the one place on a renovation where skipping a step costs you more, not less. Pay the application fee. Sit through the meeting. Get your drawings right.


    Who you actually call

    What you need Where to go
    Building permits inside Duncan city limits City of Duncan Building Department, 250-746-6126, developmentservices@duncan.ca
    Building permits in North Cowichan, CVRD areas CVRD Building Inspection
    Electrical permits anywhere in BC Technical Safety BC
    Gas permits Technical Safety BC
    Health approvals (septic, food service, pools) Island Health (VIHA)
    Anything you’re still confused about Call 250-746-6126 and ask

    City Hall: 200 Craig Street, Duncan, B.C. V9L 1W3


    FAQ

    Do I need a permit for a deck in Duncan?
    If the deck surface is more than 600 mm (about 2 feet) above grade, yes. Below that, generally no — but check with the city before you start, because attachment to the house can change the answer.

    Can I pull my own permit as the owner?
    Yes. Owners can apply for permits on their own property. If someone else applies on your behalf (designer, contractor, friend), they need an Appointment of Agent form signed by you.

    How long is a Duncan building permit valid?
    BC standard is generally one year before work has to start and several years to complete. Specific terms are on your permit. Don’t let it expire — renewal fees stack up.

    Does the City of Duncan accept electronic submissions?
    Most BC municipalities have moved to email submission. Confirm the current process when you call — small municipalities update their procedures more than the website reflects.

    What if I’m replacing a roof or siding?
    Like-for-like replacement of roofing or siding typically doesn’t need a permit. Replacing with dissimilar materials (changing siding type, or roofing type) usually does.

    My property says “Duncan” on the mail but I’m not sure if it’s in the City of Duncan.
    Call 250-746-6126 and give them your address. They’ll tell you in 30 seconds. If you’re not in the city, they’ll route you to North Cowichan or the CVRD.


    Bottom line

    The permit process in Duncan isn’t fast and isn’t cheap, but it’s not the nightmare people make it out to be. Talk to staff before you submit. Get your drawings right the first time. Keep the approved set on site during every inspection. And confirm whether you’re actually in the City of Duncan or in the CVRD before you call the wrong office.

    If you’ve got a project in mind and you’re not sure where to start — start with the phone call. 250-746-6126. They’ve heard it all before.


    Related guides from Homer Shack Hub:


    Brew approves the messages. — Mark Dupuis, Duncan, BC
  • How to Tell If Your Car Salesman Is About to Waste Your Time (From a Guy Who Watched It Happen for 20 Years)

    Last updated: May 10, 2026

    I Spent 20 Years On the Other Side of That Desk

    I sold cars on Vancouver Island for over twenty years. Started at Bow Mel Chrysler when I was 29, finished with fifteen years at Duncan Honda before MS made me hang it up in 2015. Somewhere in there I worked Tom Harris in Nanaimo and Wheaton Pontiac Buick. Four dealerships. Thousands of customers. Every kind of buyer you can imagine.

    So when I say you can tell in the first five minutes whether the salesman across from you is going to find you the right car or waste your Saturday — I mean it. I’ve watched both happen so many times I could write the script before either party opens their mouth.

    This post is everything I learned about reading car salesmen from the inside. It’s not anti-salesman and it’s not anti-dealership. We’ll get to that at the end. It’s pro-informed-customer — because a buyer who knows the game saves time, money, and frustration. And honestly, so does a good salesman working with that customer.

    The First Tell: The Wet Noodle Handshake

    I hate a wet noodle handshake.

    When a salesman walks up to greet you and shakes your hand like a damp dish rag — that tells you something instantly. Either he doesn’t care, or he doesn’t have the confidence to do the job, or he’s already gone through the motions so many times today that you’re just one more lap on his shift.

    A proper salesman shakes your hand like he means it — firm, eye contact, your name spoken back to you. That’s not a sales trick. That’s a guy who’s about to actually pay attention to what you’re about to tell him.

    If you get the wet noodle, don’t even sit down. Politely say you’re just looking and walk to a different lot. There are dealerships across the entire Island. There’s only one weekend.

    The Second Tell: Did He Actually Listen?

    This is the single biggest mistake I watched green salesmen make for two decades. I’d be working with my own customer on the lot, watching a newer guy out of the corner of my eye, and I’d want to scream — but I couldn’t, I had my own person to help.

    Here’s what would happen. A customer would walk in and say something specific in the meet-and-greet. “I need a truck for work. Something I can haul plywood in.”

    Three minutes later, the green guy is walking them past a row of cargo vans.

    He didn’t listen.

    The customer said “truck.” The customer said “haul plywood.” The customer was telling him exactly what to put them in. And the salesman was already running his own internal script of “what do we have on the lot that I can sell today?” instead of “what does this human across from me actually need?”

    As a veteran watching that play out, you just want to take over. But you can’t. You have your own people to help.

    The lesson for you, the buyer: say what you need in plain language in the first thirty seconds. Then watch what he does. If he shows you something that matches what you said, he was listening. If he immediately pivots to whatever’s sitting on the front line, he wasn’t. Walk away from the guy who wasn’t.

    Some salesmen have it. Some don’t. And you can spot them in five minutes.

    The Third Tell: Did He Respect Your Spouse?

    This one’s bigger than people realize.

    Nine times out of ten, the partner is the one you really need to impress. Because nine times out of ten, the partner has the real control over the money.

    I watched this dynamic play out a thousand times. Husband and wife come in, husband is the obvious car enthusiast, and the green salesman makes the rookie mistake of talking only to the husband. Eye contact only with the husband. Questions only to the husband. Wife is standing there politely while the salesman walks her partner through every spec sheet like she’s not part of the decision.

    That sale is dead. She’s already decided.

    The veteran salesman knows: shake the wife’s hand first. Ask HER what she’s looking for. Make her feel like an equal participant. Because she controls the household budget more often than not, and even when she doesn’t, she’s the one who will say “I don’t like that one” on the drive home and kill the deal in the driveway.

    So as a buyer, here’s how to use this: watch how the salesman treats your partner. Is he making eye contact with both of you? Does he ask both of you what matters in the car? Or does he default to the husband / the guy / whoever he thinks holds the wallet?

    If he’s dismissive of your partner — that’s a tell about the kind of guy he is, and what your experience with him is going to look like for the next two hours.

    The Fourth Tell: The Upsell-Then-“Discount” Game

    This one’s the dirty little secret of the lot.

    Dealerships push salesmen to upsell everything they can — undercoating, paint sealant, fabric protection, window tint, roof racks, rear spoilers, mud flaps, anything. Every accessory in the catalogue. The dealership wants those numbers added to every deal because that’s where a chunk of the margin lives.

    Here’s the move you need to understand: the salesman builds value in those accessories. He really sells you on them. “This undercoating will save your truck from BC rain. The window tint will keep the interior temperature down. The fabric protection is worth its weight in gold for kids and dogs.”

    You start to want them. You start to feel like the car needs them.

    Then — when you sit down to negotiate — the salesman uses those exact same accessories as negotiation chips. “Okay, you know what, I’ll throw in the undercoating for free. And I’ll get the window tint included.”

    And you feel like you got a deal.

    You didn’t. Those items were always coming. The dealership was always going to throw them in because the margins on accessories are sky-high and the cost to “include” them is tiny compared to dropping the actual car price by the same dollar amount.

    The lesson: don’t get excited when they “throw in” the undercoating. That was always on the table. Negotiate hard on the price of the actual vehicle instead. The car price is where the real money lives.

    The Closer Move: The Courtesy Bump

    Now I’m going to tell you the move almost nobody outside the industry knows by name. It’s called the Courtesy Bump.

    Here’s how it works.

    You and the salesman have negotiated. You’ve agreed on a number. Handshake deal — basically done. The salesman says he just needs to take it back to the manager for approval. He gets up and disappears into the sales manager’s office.

    What do you imagine is happening in there?

    You probably picture the salesman fighting for you. Going to bat. Trying to convince the manager to accept your number. Strategizing.

    Here’s what’s actually happening in that office: the salesman and the manager are sitting there bullshitting about the weekend, or the manager’s kids, or last night’s game. For three or four minutes. The deal is already done. There was nothing to fight over. The manager approved your number the moment the salesman walked in.

    But three or four minutes is the right amount of time. Long enough that it feels real. Short enough that you don’t lose patience.

    Then the salesman walks back out with one more ask. A small bump. Maybe an extra hundred dollars on the price. Maybe a slightly higher rate on the financing. Something small but real. The salesman delivers it with some version of “the manager said this is the absolute lowest he can go, but we’re so close.”

    Here’s why this move works: the customer needs to win. After all that time, all that negotiation, the customer has emotional investment in the deal. So when they hear “one more small bump,” they push back — and they negotiate that bump down a little. Maybe they get it down to fifty bucks. Maybe they get it dropped entirely.

    And they walk out of the dealership feeling like they won the negotiation. They didn’t. The dealer just gave them their dignity back at the end of a deal that was already perfectly fine.

    The name of this move on every lot in Canada is the Courtesy Bump.

    The lesson: when the salesman comes back from “the manager” with one more ask — recognize what’s happening. You’re not actually losing. You’re being given a win to walk out happy. You can accept the bump, you can push it back, or you can hold your ground entirely. None of those is wrong. But knowing it’s a script means you don’t have to feel bullied or bewildered. You can just decide what you want to do.

    When to Walk

    If any of these tells stack up on the same salesman, here’s the simple rule:

    The lot is full of cars. The salesman is not. Walk.

    Most dealerships on Vancouver Island have multiple salespeople on the floor at any given moment. If your guy is the wet-noodle, not-listening, dismissing-your-wife, hard-upsell type — you have every right to politely thank him, walk back out, and either ask for a different salesperson or drive across town.

    This isn’t rude. This is exactly what an informed buyer does. A good dealership will respect it. A bad dealership wasn’t going to take care of you anyway.

    The Honest Bottom Line — Salesmen Aren’t Evil

    I want to land this one carefully because it matters.

    Salesmen aren’t evil. Dealerships aren’t bad.

    Most car salesmen are working hard to make a living. They have families, mortgages, and bonus structures that determine whether they’re making it or getting fired in three months. Most of them genuinely want to help you find the right vehicle — partly because that’s how they hit bonus, and partly because the best salesmen build their entire careers on repeat customers and referrals. I once sold an Accord to the owner of Tigh-Na-Mara Resort, then sold him a second one, then he brought his mom to me as a customer. That’s not a transaction — that’s a relationship. And that’s what the good ones are after.

    Dealerships have to make money. That’s how the lights stay on, how the service techs get paid, how the warranty work gets done. There’s nothing wrong with a dealership wanting to win the deal. The system is fair when both sides are informed.

    What this post is really about is levelling the playing field. A buyer who knows the game has a faster, fairer deal with a salesman who knows what he’s doing. Everybody wins. The buyer drives off with the right car at a fair price. The salesman hits bonus. The dealership keeps the lights on. And six months from now, when something needs to be serviced, the customer comes back — and the relationship builds.

    The whole game falls apart when ONE side is operating in the dark. So now you’re not in the dark. Use it well.

    Need Help Reading a Salesman?

    If you’ve got a car-buying decision coming up and want to talk it through with someone who’s been on the other side of that desk for twenty years, drop me a line through the Contact page. I’m not a licensed automotive advisor and nothing here is professional advice — just the read of a retired Honda guy who’s happy to share what he saw.

    Brew approves the messages.

    — Mark Dupuis
    Duncan, BC

  • How to Spot a Tradesperson Worth Hiring (From a Guy Who Sold to Them for 20 Years)

    Last updated: May 9, 2026

    I Read People for a Living. Now I Have to Hire Them.

    I sold cars for over twenty years on Vancouver Island. Fifteen of those years were at Duncan Honda. The job — when you boil it down — was reading people across a desk in under five minutes. Who was a real buyer. Who was just shopping a number to take to another lot. Who needed a Civic and who needed a Ridgeline. Who was telling the truth and who was telling me what they thought I wanted to hear.

    After a while, you stop thinking about it. You just know.

    Then MS forced me to retire, and the table flipped. All the things I used to do for myself — the deck, the back fence, the furnace, the roof, the addition I tried to build for my mom — I now have to hire somebody to do. And every contractor who walks up my driveway is sitting in the same chair my customers used to sit in across from me.

    Twenty years on the lot taught me one skill that's worth gold to a homeowner: how to tell, in the first ten minutes, whether the person quoting your job is honest, capable, and going to finish what they started. This post is everything I learned about that — applied to hiring tradespeople in BC.

    This isn't going to be a generic "get three quotes" article. You can find that everywhere. This is the actual playbook from somebody who reads people for a living and is now on the homeowner's side of the table.

    Step 1: Do Your Homework Before You Open the Door

    Here's the rule I live by: before any tradesperson sets foot in my house, I already know what the problem is and roughly how it should be fixed.

    Not because I can do the work — MS has made sure I can't. But because I've spent twenty minutes on Google, fifteen minutes on YouTube, and ten minutes reading what BC homeowners on forums say about the exact issue. By the time the contractor shows up, I'm not an expert — but I'm competent enough to follow the conversation. That's all you need.

    Why this matters: if a guy comes at me with a bunch of mumbo-jumbo and big fancy words, and he's not telling me what I already know, he's just a bullshitter. You can show him the door.

    The key is doing just enough research to spot the malarky. Not a Master's degree in HVAC. Just enough that when he says "the heat exchanger needs a tertiary recalibration," you can ask "why? My research said the most common issue here is X." If he can answer that simply and directly — he probably knows his trade. If he gets defensive, evasive, or starts using even bigger words — show him the door.

    This one habit alone has saved me thousands of dollars over the years.

    Step 2: Listen for the Big Words

    Real tradespeople, in my experience, talk simply. They say "your flashing's gone, water's getting behind the siding, here's what it costs." They don't dress it up. They don't need to.

    The ones who dress it up are usually doing one of two things:

    Hiding that they don't actually know what they're doing. Big words can fill a silence where confidence should go.

    Pricing-up the job in your head. A "specialty hydronic transfer assembly" sounds more expensive than "a thermostat." Sometimes it's the same part.

    The longer my career on the car lot ran, the more I realized: the salesman pulling out the biggest words was usually the one with the weakest case. The trades work the same way. The good ones explain. The bad ones perform.

    Step 3: Confront the Game — Politely, Directly

    This one comes straight from the lot.

    When somebody walked into Wheaton Pontiac or Duncan Honda and started shopping me a number — pretending they hadn't been to four other dealerships first — I'd just say it: "Look, I know you must've been to Nanaimo Honda and seen the exact same one as this. What number do I have to beat to get this done?"

    Nine times out of ten, they'd serve up the number. If I could beat it, I'd beat it. If I couldn't, we'd shake hands and they'd go buy from the other guy. Everybody saved themselves an hour of dancing.

    You can use the exact same play on tradespeople. You don't have to pretend it's the only quote you're getting. When you've got a couple of numbers in hand, lead with it: "I've had two other quotes on this job. They're in the $8,000 to $10,000 range. Where do you fit in, and what do I get for the difference?"

    If they get cagey or insulted — that tells you who they are. The good ones will either confirm the range and explain their value, or admit they can't compete and bow out gracefully. Either way, you've saved yourself two weeks of "we'll get back to you on Tuesday."

    Step 4: Get a Real Contract — Not a Handshake

    I'm a salesman by trade, so I'll tell you what I know about handshakes: a handshake is good. A contract is better. A contract from somebody you'd shake hands with anyway is best.

    A handshake from a proven performer with impeccable references will get a job done — most of the time. But "most of the time" isn't the standard you want when you're spending $20,000 on a roof. Nothing beats a written contract because a contract is binding and can't be messed with. Once it's signed, you both know what you're getting and what you're paying.

    What a real contract should include (the BBB recommends most of these):

    Full contact information — legal business name, address, phone, email

    Start and completion dates — specific, not "in the spring"

    Detailed description of the work — exact scope, materials, brand names where it matters

    Payment schedule (we're getting to this)

    Warranty information — what's covered, for how long

    Who pulls the permit — and who pays for it

    Who handles cleanup — yes, write this in. I'll explain why later.

    All verbal promises in writing — if it isn't written, it doesn't exist

    If a contractor pushes back on a written contract — that's your answer. Walk away.

    Step 5: The 1/3, 1/3, 1/3 Payment Rule

    Here's the line that's saved more BC homeowners from getting burned than any other piece of advice I give:

    Never pay all the money up front. Ever.

    If a tradesperson wants 100% before they start — that's a no-go. Tell him no. He's either broke, scamming, or both.

    The structure that actually works — that I've used with every contractor I've hired — is straightforward:

    1/3 at the start — covers initial materials and shows you're serious

    1/3 at the midpoint — when measurable progress is on the ground

    1/3 at completion — when the job is done, signed off, and cleaned up

    This isn't just safer for you. It's better for the work. That last third keeps a contractor motivated to finish strong. Without it, you'd be amazed how often a "90% done" job stays at 90% done forever.

    The Better Business Bureau confirms this approach — they explicitly warn against high upfront payments and cash-only deals as some of the top home-improvement scam red flags.

    Step 6: Know What's Actually Licensed in BC

    This is one of the most important things BC homeowners don't know:

    BC does NOT require a general contractor's licence for renovation work on existing homes. Anyone can put a magnetic sign on their truck and call themselves a contractor.

    But several specific trades DO require provincial licences, and they're the ones you can verify:

    Electrical work — Licensed by Technical Safety BC (Class A or B). Ask for the licence number.

    Plumbing work — BC Certificate of Qualification required.

    Gas work — Licensed gasfitter (Class A or B).

    New home construction — Licensed Residential Builder under the Homeowner Protection Act, with mandatory 2-5-10 warranty insurance.

    Asbestos abatement — Mandatory licence from WorkSafeBC since January 2024 (WorkSafeBC AAL Registry).

    Two free verifications you can do in five minutes:

    Request a WorkSafeBC clearance letter — this confirms the contractor is registered and current on premiums. If they aren't, YOU are liable for any worker injuries on your property.

    For electrical, plumbing, or gas — ask for the licence number and verify it directly with Technical Safety BC.

    If a contractor refuses to provide either of these — that's your answer.

    Step 7: Watch the Professionalism

    This is the simplest test on the list and the one most people skip.

    If the tradesperson is rude or unprofessional during the quote — they will be rude or unprofessional during the job.

    Watch how they:

    Talk to your spouse (especially if they default to talking to the husband)

    Treat the receptionist or office staff if you visit their shop

    Show up on time for the quote — or not

    Take their boots off at the door — or not

    Clean up after themselves when they leave the consultation

    Answer your "dumb" questions — patiently or with eye-rolls

    A guy who's rude at the quote is the same guy who's going to scream at his apprentice in your driveway at 7 a.m. on a Saturday. Don't sign with that guy.

    The Slob Story (And Why "Complete" Is Part of the Job)

    I want to close with a real story.

    I hired a contractor once who was, in most ways, exactly what you'd want. He showed up on time. The price was fair. The quality of his work was genuinely great — no complaints about what he built.

    But when he finished the job, he packed up his tools, took my final cheque, and left all his crap and garbage everywhere. Drywall scraps. Empty caulking tubes. Cigarette butts. Coffee cups. Lengths of trim he didn't use. Just gone — and his mess stayed.

    It took me two days to clean up properly. Two full days I had to work around — and not work around easily, given my MS. So even though the job and the price were perfect, the cost of his "completion" came out of my time and my health, not his.

    That experience taught me one of the most important lessons I've ever learned about hiring trades: complete is part of the job.

    A great tradesperson finishes the work, hauls out the garbage, sweeps the floor, and leaves your home better than they found it. A guy who half-asses the cleanup is telling you, loudly, that he doesn't care once the cheque clears.

    Word of mouth gets around. Don't be the slob who blew his own reputation. And don't pay one either — the cleanup goes in the contract, in writing, every single time.

    The Honest Bottom Line

    Hiring a tradesperson in BC is not as hard as the internet makes it seem. The whole game comes down to:

    Do enough homework to spot mumbo-jumbo.

    Talk to people who use simple words.

    Confront the game — be direct, ask the real question.

    Get a contract, not a handshake.

    Pay 1/3, 1/3, 1/3 — never all up front.

    Verify the licences you can actually verify.

    Watch the professionalism — it tells you everything.

    Make sure cleanup is in the contract.

    Twenty years across a desk taught me people don't really hide who they are. They show you in the first ten minutes — if you know what to look for. Now you do.

    Need Help Reading Someone?

    If you've got a contractor on your driveway tomorrow and your gut is telling you something's off — drop me a line through the Contact page. I'm not a licensed inspector, and nothing here is professional advice — just the read of a guy who's been on the other side of a desk for twenty years and is happy to share what he sees.

    Brew approves the messages.

    — Mark Dupuis

    Duncan, BC

    Sources:

    Vancouver General Contractors — BC Contractor Licensing Guide 2026

    Better Business Bureau — 10 Home Improvement Mistakes to Avoid

    Better Business Bureau — Home Improvement Scam Tips

    WorkSafeBC — Asbestos Abatement Licence Registry (2024)

    WorkSafeBC — clearance letters and registration

    Technical Safety BC — licence verification

    BC Housing — Licensed Residential Builder & 2-5-10 Warranty info

  • Trades for People Over 40: Real Talk From a Guy Who Watched It Happen Twice

    Last updated: May 8, 2026

    I Spent 20 Years on the Wrong Side of "Stable"

    I sold cars for over twenty years on Vancouver Island — the last fifteen at Duncan Honda. Sales is a trade in its own way, but it isn’t a stable one. Your income swings with the month. The dealership reorganizes and people get cut. A new manager comes in with new “metrics” and suddenly the guy who built half the customer base is being told to hit a different number.

    I lived that for two decades. I made decent money. But I never once felt like the floor under me was solid.

    So when somebody over 40 asks me — “do you think I should get into the trades?” — I don’t give them the cheerful internet answer. I give them the answer somebody who watched it from a car-lot desk for twenty years would give. Money is real in the trades. Stability is real. But there’s a catch nobody warns the over-40 crowd about, and we’ll get to that too.

    This post is for the guy or woman who’s looking at their current job and wondering if it’s time. It’s for the person whose office gig keeps “restructuring.” It’s for the sales rep who’s tired of starting from zero every January. It’s for the parent who needs a job that’s still going to be there in ten years.

    Why Over-40s Are Looking at the Trades in 2026

    Two reasons, mostly. Money and stability.

    Money first — because we have to be honest. A licensed electrician in BC is making $38 to $50 per hour as a journeyman in 2026. That works out to $79,000 to $104,000 a year depending on what you’re wiring and where (WorkZen Canadian Electrician Salary Guide 2026). A plumber on Vancouver Island is hitting a $35.20/hour median — about $73,000 a year — with the high end pushing $44 (Government of Canada Job Bank, BC plumber wages). Automotive techs in BC have a median around $35/hour and a high of $49 (Job Bank, BC auto technician wages). Welders in BC average around $36.61/hour, with the top earners pulling $40+ (Indeed BC welder salary).

    That’s real money. Not promised money — measured money, from federal and provincial wage data.

    But the bigger draw, for people in their 40s, is stability. Not in the romantic sense — stability the way you mean it when you’re 45, you’ve got a mortgage, kids, maybe a parent starting to need help. Stability is “my industry can’t get killed by an email from head office.”

    I’ll tell you about a customer of mine who learned that the hard way.

    The Tim Hortons Baker Who Became an Electrician

    Mid-1990s, when I was selling at Wheaton Pontiac Buick. A young woman walked onto the lot. She had a steady job — Tim Hortons, in-store baker. Back then, every Tim Hortons had real bakers making real donuts in the back of the store. It was good work. She was proud of it. She bought a brand-new Pontiac Grand Am from me on the strength of that paycheque.

    Three months later, she came back for service and told me Tim Hortons had fired all the in-store bakers. Every one of them. Corporate had decided to start trucking in pre-made donuts from a central plant. The bakers found out the same week the customers did.

    She had no warning. No severance to speak of. Her trade — donut baker — was gone. Not slow-died over years. Killed in one boardroom decision.

    She didn’t sit around. She got into the electrical apprenticeship system. Four years of school and on-the-job hours, and she came out the other side as a licensed electrician. She kept coming back to me for service through that whole journey, and we became friends. By the time she was a few years post-ticket, she was making more money than half the office workers I knew, with benefits, with a pension contribution, and — this is the part that matters — with skills nobody at corporate could outsource with a memo.

    That story stuck with me. The trades didn’t just give her income. They gave her something corporate Canada had taken away: the ability to control her own next move.

    The Catch Nobody Tells the Over-40 Crowd

    I’m not going to sell you a fairy tale. Here’s the part most blogs leave out.

    It’s a young man’s game when you start.

    The money at the top is real. The money at the bottom is humbling. As an apprentice, you’ll be doing the dirty jobs, the cleanup jobs, the “go grab the thing from the truck” jobs. You’ll be making far less than the journeyman beside you, even though you’re showing up to the same site at the same time. First-year electrical apprentices in Canada generally earn 50–60% of the journeyman rate (WorkZen guide). For a 45-year-old who’s used to making $80K, that’s a real adjustment.

    The other thing nobody warns you about: the older guys won’t talk to you at first.

    Doesn’t matter that you’re roughly the same age. Doesn’t matter that you ran a sales floor or a kitchen or a delivery route for twenty years. Day one on a job site, you’re a newbie. Until the OGs see you put in the work — until you’ve been there long enough to count, until they know you’re not going to quit on them in three weeks — you’re not part of the conversation. You eat your lunch a little to the side. You get the silent nods, not the stories.

    I’m telling you this because I’ve watched guys go in expecting to be welcomed and fold inside two months. The ones who lasted understood: paying your dues isn’t an insult. It’s the trade. Once you’ve done it, the OGs warm up. The information starts flowing. The good jobs find you. But you have to get through the first year.

    If you go in expecting that — knowing it — you’ll do fine. If you go in expecting respect for being 45, you won’t.

    Which Trades Actually Make Sense After 40

    I’m going to tell you what I’d tell my own kid if they were 42 and asking. This is from twenty years of selling cars to BC tradesmen and watching whose bodies held up and whose didn’t.

    Electrician

    The brain trade. Less back-breaking than most. Tools are lighter. The work is varied — residential, commercial, industrial. Top wages in BC. The path is well-defined and BC’s apprenticeship system through SkilledTradesBC is one of the most generous in Canada. If I were starting at 42 with a sore back, this is where I’d look first.

    Plumber

    Hard on the body, but the money is excellent and the demand never stops. People are always renovating bathrooms, fixing leaks, building suites. The downside is real — knees, shoulders, crawling under sinks at 50 hits different than at 25. But BC plumber wages are some of the highest of any trade and there is essentially zero unemployment risk. Plumbers don’t get laid off.

    Automotive Mechanic

    This is my old neighbourhood — and I have a strong opinion. If you’re going into automotive over 40, get into a great dealership if you can. Independent shops can be excellent, but a busy dealership service department teaches you faster because you’re seeing more vehicles, more problems, more repeat issues. You build a knowledge base in years that takes a decade at a slow shop. Plus — at a dealership, you usually have the manufacturer’s training program, the parts on hand, and the lifts and equipment you need to do the work right.

    If you’re aiming at Honda specifically, BC has a real path: the BCIT Automotive Technician Honda/Acura Foundation program is exactly the kind of program that takes someone with no experience and gives them a real shot at a dealership floor.

    Welder

    Hardest on your body, but the wages are real and the specialized work pays huge. Pipeline welding, structural welding, certified pressure-vessel work — these can pay over $100K once you’re ticketed and certified. Red Seal data shows the Canadian average welder hourly wage at around $40.73, and BC top welders are pulling more. The trade-off: eyes, lungs, joints. Wear your PPE like your life depends on it, because it does.

    The Honda Buddy I Watched Reinvent Himself

    Stories close better than statistics, so let me tell you one more.

    When I was at Duncan Honda, we had a guy in the shop who started out doing oil changes and tire rotations. Just the basics. He’d come over to the lot and chat with the salesmen between jobs. Quiet guy, hard worker, no chip on his shoulder.

    He got into the Honda Canada apprenticeship program — the proper structured one where you learn the brand, get certified by the manufacturer, and rack up your provincial apprenticeship hours at the same time. Four years.

    I watched him change.

    By year two, he was doing brake jobs and clutch work without supervision. By year three, he was diagnosing issues that the senior techs would come ask him about. By year four, when he completed the program, he was a Red Seal automotive service technician earning real money in a busy, secure dealership service department. He’d gone from oil-change guy to one of the most valuable people on the floor.

    Watching him change was incredible. He came in unsure if he could do it. He came out of the program a different man — more confident, more skilled, paid better, working alongside people who respected him. The dealership wasn’t just paying him. They were protecting him, because he was harder to replace every year.

    That’s what the trades do for someone who’s willing to put in the four years.

    The Honest Bottom Line for the Over-40 Reader

    Going into the trades after 40 isn’t easy. It isn’t fast. The first year will test you. The OGs won’t roll out the welcome mat. Your body will let you know when you’re running out of road.

    But here’s what I’ve watched, twice now, with my own eyes: the people who do it come out the other side standing taller. They earn real money. They have skills nobody can take away with a memo. They wake up in the morning knowing what they’re doing and who they’re doing it for. That’s worth a lot, especially in a job market that keeps “restructuring” the people over 40 out the door.

    If you’re sitting at your desk wondering if it’s time — read the job postings. Walk into a dealership and ask about apprenticeships. Talk to your neighbour who’s a plumber. Visit SkilledTradesBC and look at the entry programs.

    The first call is free. And it might be the most important one you make this year.

    Need Help Thinking It Through?

    If you’re 40+ and weighing a trades switch and want to talk it out with somebody who’s not selling you anything, drop me a line through the Contact page. I’m not a career counsellor and nothing here is professional advice — I’m a retired car salesman who watched the trades up close for twenty years and is happy to share what I saw.

    Brew approves the messages.

    — Mark Dupuis

    Duncan, BC

    Sources:

    WorkZen — Canadian Electrician Salary Guide 2026

    Government of Canada Job Bank — BC plumber apprentice wages

    Government of Canada Job Bank — BC automotive service technician apprentice wages

    Indeed — BC welder salary

    Red Seal Recruiting — 2026 Canadian welder salary guide

    BCIT — Automotive Technician Honda/Acura Foundation program

    SkilledTradesBC — apprenticeship and Red Seal information

    Trades Training BC — BC Trade Salaries and Financial Benefits

  • How to Pull a Building Permit in the Cowichan Valley: What I Learned the Hard Way

    Last updated: May 8, 2026

    About Twelve Years Ago, My Mom Broke Her Hip

    About twelve years ago, my mom broke her hip. She was the kind of woman who liked to be the centre of attention and usually got it, but a broken hip changes the game. Stairs were out. The hospital wanted her in a single-level setup before they’d even talk about discharge.

    I have stairs in my Duncan house. So I started planning a small addition off the back — two rooms, a living area and a bedroom. No bathroom, no plumbing, just a place where she could come live with us without climbing anything.

    That’s how I learned the hard way how the Cowichan Valley building permit system actually works.

    The addition never got built. My mom moved into our existing house with modifications instead, and we made it work. She’s been gone two years now. But what I learned from that permit fight has saved me — and a few people I’ve passed it on to — a lot of grief on later projects.

    This is the practical guide I wish somebody had handed me before I called the CVRD.

    First, Know Who You’re Dealing With

    The Cowichan Valley Regional District (CVRD) is the local government for nine electoral areas across the valley. If you’re outside an incorporated municipality (Duncan, North Cowichan, Lake Cowichan, Ladysmith), the CVRD is who issues your permit. If you’re inside one of those municipalities, your city handles it instead — and the rules are different. Always check first.

    The CVRD’s main building permit page is on their website. Bookmark it. You’ll be back.

    The bylaw that governs CVRD building permits is Building Bylaw No. 4433. It’s the legal document the inspector grades your project against. You don’t need to read all of it, but knowing the name of the bylaw keeps you grounded when staff say “the bylaw requires…” — you can ask for the section.

    Step 1: Find Out What You Actually Need a Permit For

    Most additions, new buildings, structural changes, decks over a certain height, plumbing changes, and secondary suites need a building permit. Replacing a roof with the same materials usually doesn’t. When in doubt, call before you nail anything.

    The CVRD’s number for inspections is on their website. Tell them what you want to build, where it sits on the property, and what you think the construction value will be. They will tell you whether you need a permit. If they say “you do,” ask the next question right away: “What zone am I in, and what are the setbacks?”

    That one question would have saved me three months of planning.

    Step 2: Understand Setbacks Before You Fall in Love With a Spot

    A setback is the minimum distance your building has to sit from each property line — front, sides, rear. In residential zones in the CVRD, the rear setback is typically 7.5 metres (about 25 feet). Side setbacks are usually smaller. Front setbacks depend on the zone.

    This is where my plan died.

    The back of my property abuts city-owned land. I planned the addition tight to the back of the existing house, where it made sense for the layout, the foundation, and getting Mom’s bedroom on the south side for sun. When I submitted the plans, CVRD came back and pointed out the obvious: the addition wouldn’t be 7.5 metres from the rear property line. Not even close.

    I asked the question every BC homeowner asks at this moment: “Can we get a variance?”

    Here’s the answer I got, and it’s the answer most people get: a Development Variance Permit (DVP) is a separate application, it’s discretionary, and it can be denied. The CVRD’s own glossary spells this out — DVPs can vary the siting and height of a building, but “these applications are discretionary, meaning it could be denied. All options to satisfy the bylaw requirements should be exhausted prior to making an application to vary the regulation.”

    Translation: even if you apply, you might not get it. And against city land, the odds drop further.

    My takeaway for anyone planning an addition in the CVRD: before you draw a single line on paper, walk the property with a tape measure. Find out where every line is — including the back one — and what’s on the other side of it. A property line against a neighbour’s residential lot is one fight. A property line against city or Crown land is a much bigger one.

    Step 3: Prepare Your Application Package

    CVRD wants a complete application up front. Incomplete applications go to the back of the line and can be sent back outright. The full list lives in the CVRD Building Permit FAQ, but the core pieces are:

    • A completed CVRD Building Permit Application form
    • A site plan showing your lot, the existing buildings, the proposed building, and all setbacks
    • Building drawings (floor plans, elevations, cross-sections, foundation details)
    • Estimated value of construction (a required field — this drives your fees)
    • Any required engineer or registered professional letters of assurance
    • Mechanical, plumbing, and electrical plans where applicable

    Submit by email to inspections@cvrd.bc.ca. The application fee is $100 for projects valued under $50,000 and $250 for projects valued over $50,000. That’s the fee just to start the review — your full permit fee gets calculated later.

    Step 4: Know the Real Permit Fee Math

    The CVRD calculates building permit fees based on your project’s estimated construction value. For renovations, alterations, and complex projects, the fee is generally 1% of the estimated value of construction. For new residential construction, there’s a separate fee schedule in Building Bylaw 4433.

    What this means in practical terms:

    • A $30,000 deck project: roughly $300 in permit fees, plus the $100 application fee
    • A $150,000 addition: roughly $1,500 in permit fees, plus the $250 application fee
    • A $400,000 new build: refer to the new construction fee schedule — fees are tiered

    CVRD does not currently take credit cards for permit fees. Cash, debit, or cheque payable to the Cowichan Valley Regional District. If you pay by cheque, write the permit number and address on it.

    Step 5: Cross Your T’s and Dot Your I’s

    This is the line I keep coming back to with anyone planning a CVRD project: cross your t’s and dot your i’s. I’ve watched neighbours and friends submit permit packages with one missing detail — a setback unmarked on the site plan, an engineer’s letter not yet stamped, an estimated construction value left blank — and lose weeks while the application sits in the “needs more info” pile.

    The reviewer is not your enemy. But they are reading dozens of files a week, and the ones that move forward are the complete ones.

    A few things that catch people:

    • Site plans without dimensions. “Approximately 5 metres” doesn’t cut it. Measure and label every distance.
    • Missing the rear lot line setback when it abuts a road, lane, or city land. That’s the one that got me.
    • Underestimating construction value. If you say a project costs $40,000 and it obviously costs $90,000, the inspector knows. They’ve seen thousands of projects. Be honest.
    • Forgetting plumbing or mechanical declarations. If your project touches a wall with a pipe in it, expect questions.
    • Skipping Riparian/Watercourse setbacks. If you’re within 30 metres of a stream, lake, ocean, or wetland, an environmental assessment may be required before your building permit can move forward.

    A Word About Bylaw 4710 (The Zoning Storm of 2026)

    If you’ve been following local news, you’ve heard about CVRD Bylaw 4710 — the 322-page draft Comprehensive Zoning Bylaw that consolidated nine electoral-area bylaws into one document. It triggered a serious community pushback. Over 100 residents protested outside the CVRD office on Ingram Street on March 31, 2026, and a Facebook group called Neighbours Against New CVRD Bylaws hit 8,700 members in two weeks.

    On April 22, 2026, the CVRD board voted unanimously to pause work on Bylaw 4710 until after the October 2026 local election.

    What this means for you, the homeowner planning a project right now:

    • Current zoning bylaws are still in force. The pause did not change today’s rules.
    • Bylaw 4710 contained proposed changes to setbacks from major watercourses (50 metres from the Cowichan, Koksilah, and Chemainus Rivers, or 30 metres from the top of a ravine bank). Those changes are paused, not adopted.
    • After the election, expect the conversation to restart. If you have property near a major waterway, slope, or agricultural reserve, watch the news.

    The takeaway: plan against today’s rules, but read your current zoning regulations carefully, especially for ALR land, riparian areas, and accessory dwelling units.

    Step 6: Inspections and the Long Tail

    Once your permit is issued, you don’t get to relax. You’re on the hook for scheduled inspections at specific construction stages — foundation, framing, plumbing rough-in, insulation, final. Miss one, and you can be ordered to expose work you’ve already covered up.

    CVRD inspectors are thorough. That’s good if you want a safe building. It’s frustrating if you want a fast one. Plan your build schedule around their availability, not the other way around.

    What I’d Tell My Past Self

    If I could go back twelve years to the day I first sketched out my mom’s addition, here’s what I’d say:

    1. Walk every property line first. Know what’s on the other side of each one.
    2. Call CVRD before you draw. A 15-minute phone call would have changed my whole plan.
    3. Build the application package fully or don’t submit it. A half-ready submission costs more time than waiting another week to get it right.
    4. Have a Plan B in your back pocket. When my addition didn’t work, modifying the existing house did. Mom got her time with us. Sometimes the permit system saying “no” is the system telling you to find a different “yes.”

    Need Help?


    Related guides from Homer Shack Hub:


    If you’re staring at a CVRD permit form and not sure where to start, drop me a line through the Contact page. I’m not a permit professional, and nothing here is professional advice — but I’ve been on both sides of “your application is incomplete” and I’m happy to share what I’ve learned. Brew approves the messages.

    — Mark

    Sources

    CVRD Building Inspection & Permits
    CVRD Building Permit FAQs
    CVRD Planning & Development Glossary
    Plan Your Cowichan – CZB project
    CBC News: Cowichan Valley bylaw pause
    Victoria Buzz: Cowichan zoning protest
    The Discourse: Bylaw 4710 details
    Province of BC, Building or Renovation Permits overview

  • BC Red Seal Trades 2026: What You’ll Actually Make, What It Actually Costs, and Who’s Lying to You

    Last updated: May 8, 2026

    Written by Mark Dupuis · The Site & The Safety / Service & The Hustle

    My dad came out of the army, took his courses, and went into the union as a plumber. By the time I was old enough to hand him a wrench, he was a card-carrying member, pension contributions every cheque, decent benefits, the whole package. When it came time for me to learn the trade, he set me up with a buddy of his who ran a shop — that’s how a lot of apprenticeships actually started back then, on a phone call between two guys who’d known each other for years. Then life took me sideways into selling Hondas for twenty years. I wrote up cars, trucks, and vans for a steady stream of tradesmen, and the thing that always struck me was that they weren’t shopping on price the way most people do. They wanted quality. They wanted a vehicle that started in the rain at 5 AM and was still running at 400,000 km. The guys who’d put their bodies through twenty years of trade work knew the cost of cheap better than anyone.

    So when I tell you what’s true about the trades in BC in 2026, it isn’t from a guidance counsellor’s pamphlet. It’s from a kitchen table I grew up at, a tool belt I wore, and twenty years of finance applications across the desk from guys still wearing their work boots.

    This is the long one. Bookmark it. It’s everything I’d tell a 19-year-old standing in front of me trying to decide if a Red Seal is worth four years of his life.


    The quick answer

    Yes. In 2026, in BC, a Red Seal trade is one of the best-paying career paths a young person can take without going into debt for a degree. The wages are real, the demand is real, and the new federal $5,000 completion bonus announced this April is real. But the path has more potholes than the government brochures admit, and the “grants” you’ll hear about are mostly loans now. Read the whole thing before you sign anything.


    What is a Red Seal, in plain English

    The Red Seal is the inter-provincial certification program. It’s the gold standard. There are 54 designated Red Seal trades in Canada (Government of Canada — Red Seal Program), and once you’ve got the seal stamped on your ticket, you can work in any province without re-qualifying. Plumber, electrician, carpenter, welder, automotive service tech, heavy duty mechanic, millwright, sheet metal worker, refrigeration mechanic — all Red Seal.

    In BC, the system is run by SkilledTradesBC (skilledtradesbc.ca). They’re the people you register your apprenticeship with, the people who track your hours, and the people who eventually sign off on your Certificate of Qualification.

    Most Red Seal apprenticeships in BC run four years. Roughly 80% of that time is on the job under a journeyperson, 20% in the classroom at a place like BCIT, VIU, or Camosun. You earn while you learn — that’s the whole point.


    What you’ll actually make in BC, by year

    These numbers are from real BC sources — SkilledTradesBC, WorkBC, BC bargaining agreements, current BC job postings on Red Seal Recruiting and ZipRecruiter. Not American averages, not “national” numbers that get pulled up by Alberta oil money.

    Plumber (NOC 72300)

    • Apprentice, year 1: ~$17–$22/hr (Payscale BC apprentice plumber data)
    • Apprentice, year 4: ~$28–$34/hr
    • Journeyperson, non-union, Vancouver Island commercial: $40/hr (UA member data, r/skilledtrades)
    • Journeyperson, UA Local 324 (Island/Interior): $42.92/hr base + pension + benefits
    • Journeyperson, UA Local 170 (Vancouver): $47.50/hr base + pension + benefits — works out to roughly $60/hr fully loaded with vacation pay and pension contributions (UA Local 324 Industrial Agreement, BC Bargaining)
    • Owner-operator, one-man shop: $90/hr is common on Vancouver Island
    • Travel jobs (camp work, pipeline): Up to $3,000/week

    Electrician (NOC 72200)

    • Apprentice, year 1: ~$18–$22/hr
    • Journeyperson, non-union BC residential: $36–$50/hr (WorkZen BC electrician guide)
    • Journeyperson, BC industrial/commercial: $40.87–$60/hr (Red Seal Recruiting BC postings)
    • Seaspan Vancouver Shipyards: $55.29–$61.06/hr
    • Capital Regional District (Victoria): $46.63/hr
    • Master Electrician / contractor: $90,000–$130,000+/yr

    Other Red Seal trades, BC ranges (journeyperson)

    • Heavy Duty Mechanic: $42–$55/hr
    • Welder: $30–$45/hr base, $150K+/yr possible on pipeline or NDT-ticketed work
    • Millwright: $38–$52/hr
    • Automotive Service Technician (my Honda lot guys): $28–$45/hr flat rate, plus bonuses on warranty work
    • Carpenter: $30–$45/hr (residential lower, ICI commercial higher)
    • Sheet Metal Worker: $35–$50/hr
    • Refrigeration & A/C Mechanic: $38–$55/hr (one of the hottest trades right now, no pun)

    What “good money” actually buys you in BC

    Don’t let the hourly rates fool you into thinking everyone’s rich. A $50/hr journeyperson in Duncan or Nanaimo is doing well. A $50/hr journeyperson in Vancouver is renting a basement suite and eating Kraft Dinner. The wage is the wage; the rent isn’t. Pick your trade with one eye on where you actually want to live.


    Union vs. non-union in BC, 2026 — the honest version

    This is where my dad’s story matters.

    When my dad was active, the union was the default. UA, IBEW, the Carpenters — these were normal places to work. Employer pension. Hiring hall dispatched you to your next job. Every cheque had pension and benefits already in it. You didn’t have to think about retirement; the local thought about it for you.

    By the time I was selling cars to tradesmen, the math had changed. Most of the guys signing finance papers across from me were non-union. Working for outfits with names like “Joe’s Mechanical” and “Coastal Plumbing.” Still making good money — sometimes really good money — but no pension. No employer health plan unless the boss was generous. And every couple of years, when work got slow or the boss got cheap, they were out looking for a new shop.

    Here’s the trade-off in plain language:

    Union (UA, IBEW, IUOE, Carpenters, etc.) gets you:

    • Higher base wage and a fully loaded “package” (wage + pension + benefits + vacation pay + training fund)
    • Employer-paid pension you don’t have to think about
    • Defined benefits health plan
    • Hiring hall — when one job ends, the next one is dispatched
    • Standardized rates so you can’t get lowballed
    • A formal apprenticeship structure that actually gets you to your ticket

    Non-union (most BC residential, most small commercial) gets you:

    • More flexibility on hours, shops, and who you work with
    • Faster path into specialty work or owner-operator
    • The ability to negotiate your own rate (up or down)
    • Sometimes faster cash in your pocket if you’re a good closer

    What you give up going non-union:

    • Pension. There isn’t one unless you make it yourself with RRSPs and discipline.
    • Stability between jobs.
    • Health benefits in many cases.
    • Backup if a boss tries to pull something on overtime, layoff order, or safety.

    The pattern I saw at Honda for twenty years: non-union guys made decent take-home in their 30s and 40s, then hit their late 50s with no pension and a body that was tired. Union guys made slightly less take-home but retired with something. Same guys who wouldn’t compromise on the truck they bought were sometimes the ones who’d compromised on the pension thirty years earlier — and you could see it on the financing forms. Both made it work. But only one of them was sleeping easy at sixty.

    If you’ve got the choice — and on the Lower Mainland you usually do — I’d join the union. On Vancouver Island it’s harder, but UA Local 324 and the IBEW locals still take applications.


    How to actually start an apprenticeship in BC

    Here’s the real path, step by step, the way SkilledTradesBC tells it (Start an Apprenticeship — SkilledTradesBC):

    Step 1 — Pick your trade

    This isn’t trivial. The trade you pick at 19 is the trade you’ll probably do until 60. Look at:

    • What’s the work like physically? (Plumbing destroys knees. Electrical is easier on the body.)
    • Indoor or outdoor? (Welding is hot in summer; carpentry is wet most of the BC year.)
    • What’s the demand where you actually want to live?
    • What’s the boss-to-apprentice ratio in shops near you? (If every shop has 4 journeymen and 0 apprentices, you’ll wait years for a spot.)

    Step 2 — Find a sponsor (an employer)

    This is the catch nobody mentions: you need a sponsor before SkilledTradesBC will register you. A sponsor is just an employer with at least one journeyperson on staff who’s willing to train you and sign your hours.

    How you find one:

    • Cold-call shops. Drop a resumé. Show up clean and on time.
    • Try Foundation programs (see below) — they often turn into sponsorships.
    • Talk to the union local in your area. They’ll dispatch you to a signatory contractor.

    Step 3 — Register on the SkilledTradesBC Portal

    Once you’ve got a sponsor, both of you create accounts at skilledtradesbc.ca. The sponsor fills out the registration form. Confirmation comes back in about 10 business days.

    Step 4 — Schedule your in-school training

    You’ll do classroom blocks (usually 6–10 weeks) at:

    • BCIT (Burnaby) — biggest trades school in BC. Electrical Foundation tuition runs about $3,000–$4,000 for the foundation block.
    • VIU (Nanaimo) — strong for Island apprentices.
    • Camosun (Victoria) — Electrical Foundation $2,670, Welder Foundation $3,178, Carpentry Foundation $2,838 (Camosun via CourseCompare)
    • Okanagan College, North Island College, College of New Caledonia — regional options.

    Classes fill up fast. Register early.

    Step 5 — Work your hours, write your exams, get your ticket

    Most Red Seal trades are 4 years × about 1,500 hours of on-the-job per year, plus four classroom levels. At the end you write your Certificate of Qualification exam and, if you pass, your Red Seal interprovincial exam. Stamp on the ticket. Done.


    The money during training: what’s real, what’s a loan, what ended

    This is the section nobody on the internet gets right. Most articles still list grants that ended over a year ago. Here’s the actual 2026 picture.

    Things that actually pay you (non-repayable)

    Apprenticeship Training Grant — $400/week — Announced by Prime Minister Carney on April 29, 2026 (PM news release, April 29, 2026). Pays you $400/week as a top-up while you’re in mandatory in-class technical training. This is brand new. This is real money.

    Red Seal Completion Bonus — $5,000 — Same announcement. One-time $5,000 payment when you complete your Red Seal certification. The old Apprenticeship Completion Grant ($2,000) ended in March 2025 (GrantCompass apprenticeship grants 2026); this one replaces and more than doubles it.

    EI Benefits during in-school blocks — 55% of your average insurable earnings, max $668/week as of 2025. No waiting period if your provincial authority refers you. Apply through Service Canada before each training block.

    BC Training Tax Credit (apprentice) — Up to $2,500/yr refundable tax credit, paid through your tax return for each completed level of training.

    Tools deduction — Up to $1,000/yr off your taxes for trade tools you bought.

    Canada Training Credit — $250/yr accumulating (up to $5,000 lifetime) toward training fees.

    Things that are loans, not grants (read carefully)

    Canada Apprentice Loan — up to $4,000 per training period. Interest-free during apprenticeship and for 6 months after, then standard student loan interest kicks in. This is a loan. You pay it back. It replaced the old non-repayable Apprenticeship Incentive Grant ($1,000/yr) and Apprenticeship Completion Grant ($2,000), both of which ended in March 2025 (GrantCompass 2026 apprenticeship guide). A lot of websites still call this a “grant.” It is not. Don’t borrow it unless you actually need it.

    Things for your employer (worth knowing because it’s why they’ll hire you)

    • AJCTC — $2,000/yr federal tax credit per Red Seal apprentice, first 2 years
    • Apprenticeship Service — $5,000–$10,000 per first-year apprentice (extra $5K if you’re from an underrepresented group: women, Indigenous, newcomers, persons with disabilities, visible minorities) (BIV — BC Construction $10M apprentice incentive)
    • BC Training Tax Credit (employer) — up to $4,000/yr per apprentice
    • BC Employer Training Grant — up to $10,000 per employee, 80% of training costs

    If a shop tells you “we can’t afford to train you,” they’re lying or they don’t know their own books. The province pays them to take you on.


    The dropout problem — and why it’s relevant to you

    Here’s an ugly stat: only 19.9% of registered Canadian apprentices actually finish their certification (GrantCompass 2026). Eight out of ten people who start a trade never end up with the Red Seal.

    Why? A few reasons I’ve watched play out in real life:

    1. They get to journey-rate-of-pay as a 4th-year and stop bothering with the exam.
    2. The shop they’re with isn’t structured — they get used as cheap labour and never see the variety of work they need for the certification hours.
    3. They couldn’t afford the in-school blocks (this is the one the new $400/week training grant is meant to fix).
    4. They quit because the body broke down or life got in the way.

    The Red Seal completion bonus ($5,000 new for 2026) is the government finally noticing this. So is the $400/week training top-up. Use them. Finish the ticket. The wage gap between a 4th-year apprentice and a Red Seal journeyperson with 5 years post-ticket is brutal — sometimes $15–$20/hr. Over a career, that’s a house.


    What’s actually in demand in BC right now

    BuildForce Canada projects Canada’s construction sector alone will need over 299,000 new workers by 2032, mostly to replace 245,000 retiring tradespeople (BuildForce Canada 2032 outlook). BC alone is looking at a deficit of close to 19,000 if recruitment doesn’t pick up.

    What that means in plain English: if you can swing a hammer, run a wire, or sweat a joint, BC will pay you to do it for the next twenty years. That’s not hype. That’s demographics.

    The trades I’d put at the top of the demand pile right now in BC:

    • Refrigeration / HVAC — heat pump retrofits driven by BC’s Zero Carbon Step Code. Massive shortage.
    • Electrician — every EV charger, every heat pump, every new build.
    • Plumber — same as it ever was. Houses leak.
    • Carpenter (especially formwork on the Lower Mainland) — every condo tower needs them.
    • Heavy Duty Mechanic — port, mining, forestry, trucking.

    The mistake people make

    They think the choice is “trade vs. university.”

    It isn’t. The choice is “do something the world needs done vs. do something the world doesn’t.” A welder with 5 years’ experience and a pressure ticket out-earns a lot of degree holders, owns his truck, and doesn’t have a student loan. A guy with a sociology degree pulling shifts at Save-On is the cautionary tale of our generation.

    The other mistake: thinking trades = “not smart.” Some of the sharpest people I’ve ever met were trades. Pipefitters do trigonometry in their head. Millwrights diagnose machinery I couldn’t even open. My dad could look at a system and tell you exactly which fitting was leaking before he picked up a wrench. That’s not “not smart.” That’s a different kind of smart, and the world is short of it.


    The better move

    If you’re 18–25 and reading this:

    1. Go to SkilledTradesBC.ca and read the trade list. Pick three that interest you.
    2. Look up the local schools for those trades. Foundation programs (a 24–30 week classroom program before you’ve got a sponsor) are often the easiest way in. Camosun, BCIT, VIU all offer them.
    3. Cold-call ten shops. Ask if they’re hiring an apprentice or willing to take on a Foundation grad. Ten calls usually gets you a yes.
    4. If you’ve got the choice, talk to the union local for your trade. Joining young is easier than joining at 35.
    5. Apply for the Apprenticeship Training Grant ($400/week) the moment you start your first in-school block.
    6. Write your exams. Finish your ticket. Get the $5,000 completion bonus.

    If you’re a parent or grandparent reading this with a kid in mind:

    • A trade is not a “fallback.” It’s a career. Stop selling it as the safety net option.
    • The kid probably doesn’t know about the grants. Print this section and put it on the fridge.
    • A 22-year-old finishing a Red Seal in 2030 is going to be in better financial shape than most 22-year-olds finishing a degree.

    Watch the line

    Couple of warnings, because this is what I actually saw on the lot:

    • Don’t sign a four-year shop contract for less than the going rate. Some sponsor-employers will lowball apprentices because they know you can’t easily switch sponsors mid-stream. Know the SkilledTradesBC wage schedule before you sign.
    • Get your hours signed off as you go. Don’t let a sponsor “do it later.” Later doesn’t always come, and lost hours mean more years before your ticket.
    • The body matters. I know guys who blew out their backs at 28 and were done. Lift smart. Use the equipment. Pay attention in safety class. There’s no Red Seal for being macho about ergonomics.
    • The MS thing. I’ll say this for any reader in my situation, or who knows someone in it: if your body changes mid-career, the trades have backstops. The “underrepresented groups” employer incentive includes persons with disabilities. Estimating, foreman work, dispatch, training — there are second careers inside the trade once your hands give out. Plan for it before you have to.

    Homer’s bottom line

    My dad came out of the army, picked up a wrench, joined a union, raised a family, and retired with something in the bank. That used to be the standard Canadian story. It got harder for my generation, and it’ll be different again for the next one. But the underlying truth hasn’t changed: somebody has to fix the leak, run the wire, and weld the joint. The world doesn’t run on apps. It runs on the people who show up at 7 AM with a tool belt.

    If you’re thinking about it, do it. Pick the trade, find the sponsor, register the apprenticeship, take the $400/week, finish the ticket, take the $5,000 bonus. The full Red Seal package in 2026 is the best deal in working-class Canada.

    If you have questions about a specific BC trade, a school, or a shop, drop them in the comments. I’ll answer what I can from experience and look up what I can’t. This page will be updated as the grants and wage tables change — bookmark it.


    Keep the notebook open

    • BC Permit Reality Check 2026: Vancouver vs. Vancouver Island
    • The $5,000 Siding Mistake: Why the BC Rain Always Wins
    • Cheap Materials That Cost More Later
    • The Walk-Away Number: Decide Before the Shiny Thing Talks

    Tags

    BC trades · Red Seal · apprenticeship BC · plumber BC · electrician BC · SkilledTradesBC · UA Local 170 · UA Local 324 · BCIT · VIU · Camosun · trades wages BC 2026


    Last updated: May 2, 2026. Wages, grants, and program details change. If you spot something out of date, email me and I’ll fix it.

  • The $5,000 Siding Mistake: Why the BC Rain Always Wins

    The $5,000 Siding Mistake: Why the BC Rain Always Wins

    Last updated: May 8, 2026

    In British Columbia, we do not just build houses. We build umbrellas that people happen to live in.

    I have seen a lot of guys come up from the south or move from the prairies thinking they can apply the same fast-and-dry rules here. They cannot. In this climate, if you skip a detail to save twenty minutes, the sky will send you a bill for five grand two years later.

    The quick answer

    Never trust the look of a finished wall. The most important parts of your house are the ones you cannot see once the siding is on.

    If your flashing is not layered like shingles and your rain screen is not breathing, you are not building a wall. You are building a sponge.

    Human Salt: The Friday Rush Disaster

    I remember a job site on the Island where a crew was racing to finish a cedar siding install before a massive November storm rolled in.

    They were buttoning up the window trim, and I saw the lead hand skip the head flashing because “the overhang was deep enough.” He figured the porch roof would keep the water away.

    He saved about 15 minutes of work and about $20 in materials.

    Two winters later, I got a call to look at a soft spot under that same window. Because the wind on the coast does not just fall, it blows sideways and up, the water had been driven right into the top of that window frame.

    Without that $20 piece of flashing, the water sat against the sheathing. By the time they saw the bubble in the interior paint, the structural studs were the consistency of wet oatmeal.

    The repair bill for the rot, the mold remediation, and the new siding was just over $5,000.

    The mistake people make

    They think waterproof means tight.

    They caulk every gap until the house cannot breathe. In BC, you do not try to stop the water completely. You manage it. You give it a clear, gravitational path to get out.

    The better move

    1. Follow the shingle rule. Everything must overlap. The top layer always goes over the bottom layer. Reverse-lapped building wrap is a future repair bill.
    2. Respect the rain screen. In BC, that gap between your wrap and siding lets air circulate and moisture dry.
    3. Treat flashing like king. Do not rely on caulk. Caulk fails. Metal flashing and good peel-and-stick tape are what stand up to a 48-hour Island soak.
    4. Remember the wind factor. Coastal rain moves sideways. Overhangs are only a suggestion to the wind.

    Watch the line

    If a contractor tells you they can save money by skipping the rain screen or using a cheap wrap that is not right for our humidity, show them the door.

    They are not saving you money. They are deferred-financing a disaster.

    Homer’s bottom line

    You can cheat a building inspector, and you can cheat a timeline, but you cannot cheat the clouds.

    Do it right the first time, or get ready to pay the BC Rain Tax in three years.

    Doing it right means having the right permit and the right plan. Use the BC Permit Reality Check before you start your next job.

    Quick Poll

    Have you ever seen a small shortcut turn into a big repair?

  • Permit Common Sense: When Nobody Will Notice Is a Bad Plan

    Permit Common Sense: When Nobody Will Notice Is a Bad Plan

    Last updated: May 8, 2026

    “Nobody will notice” is not a plan.

    It is a sentence people say when they already know they are cutting a corner.

    The quick answer

    If a job touches structure, electrical, plumbing, gas, major exterior work, rental safety, insurance, or resale value, check the permit rules before you start. A permit can feel like a pain until the missing permit becomes the expensive part.

    Human Salt

    Job sites taught me that the part you skip is often the part that comes back later. It might come back during an inspection, an insurance claim, a sale, a repair, or a failure.

    The Watch Your Step idea applies here too. Before you move, know where the next step lands.

    The mistake people make

    They think a permit is only about getting caught.

    That is too small. Permits are also about safety, documentation, insurance, resale, and knowing the job was checked against the rules where you live.

    The better move

    1. Check your local rules before starting.
    2. Write down what the job actually changes.
    3. Ask whether inspections are required.
    4. Keep receipts, photos, and permit paperwork together.
    5. Do not bury work that should be inspected first.

    Watch the line

    Rules change by location. This is common-sense guidance, not legal or building-code advice. If the job matters, check with your local authority or a qualified professional.

    Homer’s bottom line

    The shortcut nobody notices can become the problem everybody notices later.

    Planning a job that needs permits? Run the BC Permit Reality Check before you start swinging a hammer.

    Quick Poll

    Have you ever seen a small shortcut turn into a big repair?

  • Cheap Materials That Cost More Later

    Cheap Materials That Cost More Later

    Last updated: May 8, 2026

    Cheap is not the enemy.

    Wrong cheap is the enemy. There is a difference.

    The quick answer

    Use budget materials where failure would be annoying, not dangerous. Do not cheap out where water, structure, heat, height, electrical, gas, vehicle safety, or code is involved. The cheapest part of a job can become the most expensive part if it fails.

    Human Salt

    Construction and DIY taught me that “good enough” is sometimes fine and sometimes a warning siren. The trick is knowing which one you are dealing with before the wall is closed, the ladder is up, or the weather gets in.

    The scaffolding D’oh taught me to respect small choices. A simple miss can change the day.

    The mistake people make

    They judge the material by the price tag instead of the job it has to do.

    A cheap trim board might be fine in the right place. A cheap fastener, seal, hose, bracket, or safety part in the wrong place can cost you twice.

    The better move

    1. Ask what happens if this part fails.
    2. Spend more where failure causes water, fire, injury, or code trouble.
    3. Save money on cosmetic parts when safe to do so.
    4. Read the manufacturer instructions before substituting materials.
    5. When in doubt, ask someone qualified before closing the job up.

    Watch the line

    Do not treat internet shortcuts as permission to ignore building code, manufacturer instructions, or safety requirements. Cheap is fine. Unsafe is not.

    Homer’s bottom line

    Save money where it is smart. Spend money where failure gets ugly.

    Planning a job that needs permits? Run the BC Permit Reality Check before you start swinging a hammer.

    Quick Poll

    Have you ever seen a small shortcut turn into a big repair?